Blogs
Tricks of the Trade for Home Insulation
2/4/2015
Here are some tricks of the trade for insulating your home!
3 Ways to Lower Your Heating Bill
1. Door and Window Insulation.
One of the easiest ways to lower your bills is to close and seal the windows and doors of your home.
- Lock all of your doors and windows for a tighter seal.
- Caulk and seal the edges of your door and window frames. Also, replace any worn weatherstripping you find.
- Consider using window shrink film on all of your unused windows. A hairdryer will seal the transparent plastic in place.
- Remember to keep the blinds open during sunny times to take advantage of Earth’s free heat.
- Conversely, consider buying thermal curtains and keep them closed whenever the sun isn’t out.
- Buy or replace door sweeps in your home.
- Remove old and worn caulk from your windows and doors and clean the surface (let it dry) before applying a new line of caulk.
Related Content: How to Insulate Your Windows for Draft Control
2. Unblock Your Vents and Seal Your Ducts.
Air ducts are another major source of air leakage. In addition to losing precious conditioned air in your basement and attic, duct leakage depressurizes the house and sucks more outside air in. Not good!
- Make sure vents are not being blocked by furniture or draperies.
- Do NOT close vents in unused rooms. You will cause unwanted pressure in the air duct system, increased energy use, and other unintended consequences.
- Speaking of which, you should inspect your air ducts for cracks and gaps. Use duct mastic sealant or HVAC Foil Tape (NOT Duct tape, ironically) to seal any exposed seams in your supply and return ducts. Check for bases and connections near the floors, walls, and ceilings too.
- Clean the area before putting down foil tape or mastic sealant.
Repairing ducting systems can significantly reduce your utilities.
3. Insulate Your Attic.
This one is the most expensive and difficult home energy improvement, but also probably the most effective. You will save on your utility bills for many years to come!
There are better DIY guides out there than we could provide, so we are just going to give you a few tips and then direct you to the more appropriate guides.
Related Topic: Importance of A Properly Insulated Attic
Helpful Tips & Tricks
- Use safety goggles, a face mask, and work gloves while up in your attic.
- If you are using can foam make sure you have the correct respirator as directed by the manufacturer.
- Verify that your current insulation does not contain any harmful chemicals like asbestos.
- Make sure that no mold, mildew or fungus has started to grow on old damaged areas of the roof.
- Make sure attic prepped, well lit, and clean and clear before starting
- If you don’t have a floor in your attic, only walk on the attic joists/beams; otherwise, you could fall right through your ceiling (lay down a piece of wood over the joists to create a wider area to step on)
- Be sure that you have a partner or someone else in the home with you just in case you miss a step and need help. (possibly have a good drywaller and painter on standby prior to starting the work also)
- Install the correct thimbles (fire block) around exhaust flues. Ensure there is no insulation touching any exhaust or chimney pipes. Incorrect installation here could start a fire and may not be covered by insurance if you caused it.
- Vent all bath fans and dryer vents out through the roof. This will require special tools and some roofing experience
- Inspect any electrical in the attic at this time to ensure no animals have created bare wires and that all junction boxes are secure and up to code
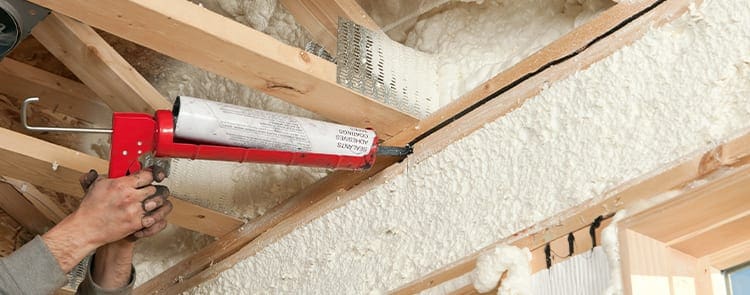
- Fill in cracks and gaps in your attic with caulk and Expandable Foam Spray before laying down insulation, which is probably the most time-consuming and hardest part
- Inspect roof vents and soffit ventilation to ensure they are free of debris and insulation
- Ensure can lights and any electrical or plumbing penetrations are sealed using the correct fire rated materials
- Start insulating from the furthest part of the attic away from the entrance/door and work back towards the attic entrance
- If you are laying new Batt insulation, make sure it does not have a paper backing and lay it perpendicular to any existing insulation
- If you are using blown-in insulation, make sure you have the correct markers placed every 100 square ft to ensure even coverage
- Keep gaps between insulation to a minimum and ensure there is no space between the drywall ceiling and the insulation
- Insulate the back of the attic access cover with an insulated panel (foam board min of R38) and install weather stripping seals on both the door and the frame to ensure an airtight seal.
- Clean up and properly dispose of any waste.
Before starting your attic insulation project, give your Service Legends professional a call at 515-657-6634. We’d be glad to answer any of your questions and can even help you choose the right insulation for your home.
And remember, that if you do make major insulation changes, consult with your HVAC contractor to assess the ventilation and general balance of your system. Changing the insulation may require changing settings on your thermostat or even the heating and cooling system to maximize the benefits of your new insulation.
Heating and Cooling Des Moines Since 1997
At Service Legends, we take pride in heating and cooling Des Moines and the surrounding areas. Our HVAC services include furnace and air conditioner installation, repairs, maintenance, and tune-ups. Our lineup of Indoor Air Quality solutions includes whole-home humidifiers, air purifiers, and air filtration systems. We can even help with HVAC financing.
Call 515-657-6634 to contact our Home Comfort Heroes today. We’re standing by 24/7.
Additional Resources
- Save On Your Winter Heating Bills With Home Insulation
- Air Sealing Tips to Prep Your Home For the Winter
- Is Duct Cleaning a Waste of Money?
- July 2025
- June 2025
- May 2025
- February 2025
- January 2025
- December 2024
- October 2024
- June 2024
- October 2023
- September 2023
- January 2023
- December 2022
- November 2022
- October 2022
- September 2022
- August 2022
- July 2022
- June 2022
- May 2022
- April 2022
- March 2022
- February 2022
- January 2022
- May 2021
- November 2020
- October 2020
- September 2020
- July 2020
- June 2020
- May 2020
- March 2020
- February 2020
- December 2019
- November 2019
- September 2019
- May 2019
- April 2019
- January 2019
- December 2018
- November 2018
- October 2018
- July 2018
- October 2016
- September 2016
- August 2016
- July 2016
- June 2016
- May 2016
- April 2016
- March 2016
- February 2016
- January 2016
- December 2015
- November 2015
- October 2015
- September 2015
- August 2015
- July 2015
- June 2015
- May 2015
- April 2015
- March 2015
- February 2015
- January 2015
- December 2014
- November 2014
- October 2014
- September 2014
- August 2014
- July 2014
- March 2014
- February 2014
- January 2014
- December 2013
- November 2013
- October 2013
- September 2013